0

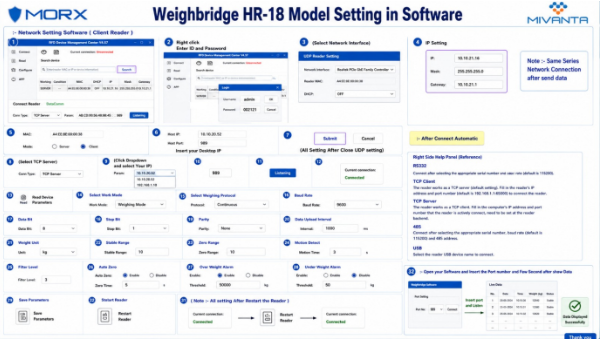
Weighbridge HR-18 Model Setting in Software
Overview
This guide explains the complete software configuration process for the HR-18 RFID Reader in Weighbridge applications. Follow the step-by-step settings shown below to configure network communication, reader parameters, GPIO settings, output configuration, and weight data transmission.
Step 1 – Network Setting Software (Client Reader)
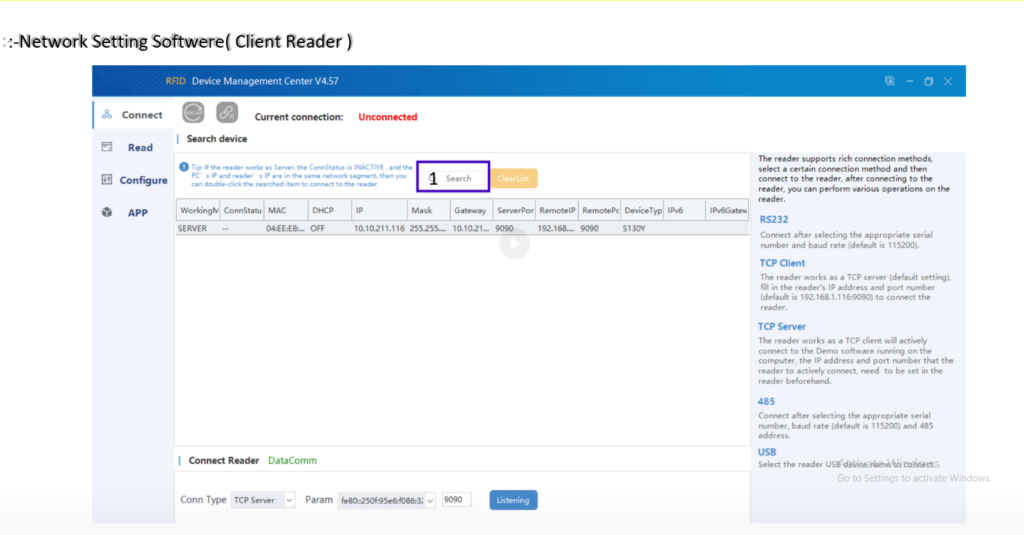
Open RFID Device Management Center V4.57 and search for the HR-18 reader on the network. Verify that the reader appears in the device list before proceeding.
Step 2 – Enter ID and Password
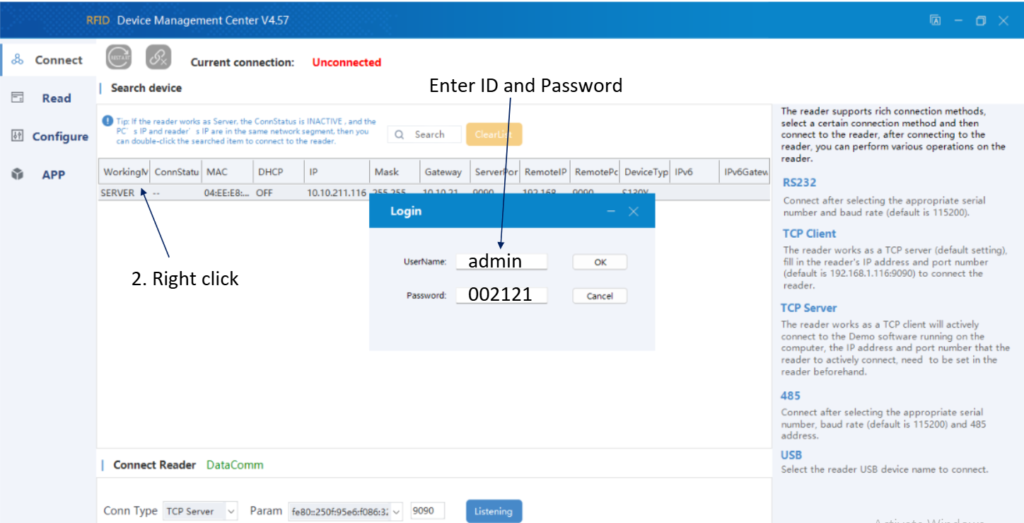
Right-click the detected reader and open the login window. Enter the default credentials and access the reader configuration panel.
Username: admin
Password: 002121
Step 3 – Configure Network Interface
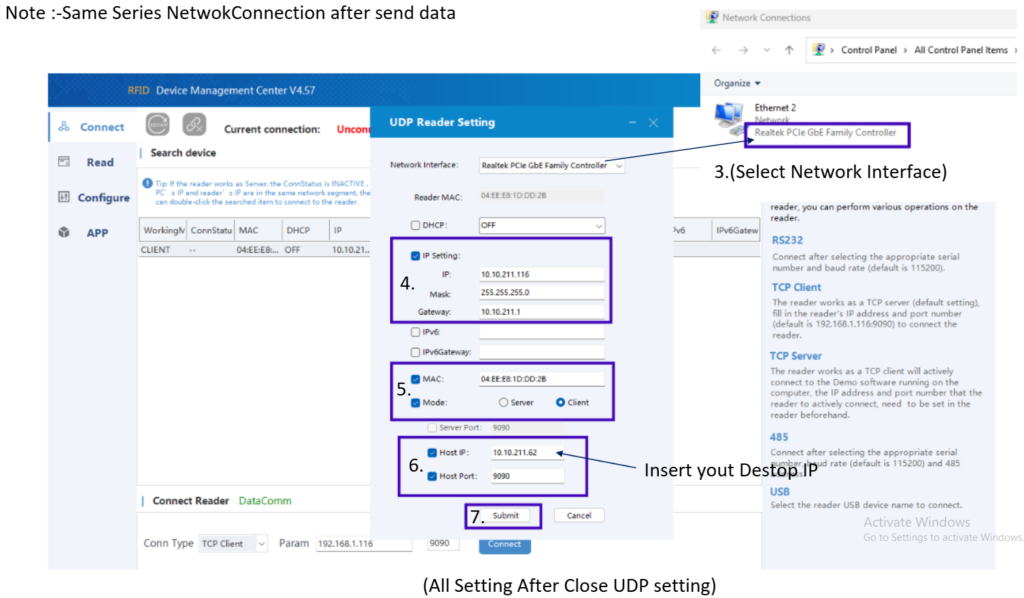
Open UDP Reader Setting and select the correct network adapter. Configure IP Address, Subnet Mask, Gateway, Reader Mode, Host IP, and Host Port according to your local network environment.
Step 4 – Select TCP Server
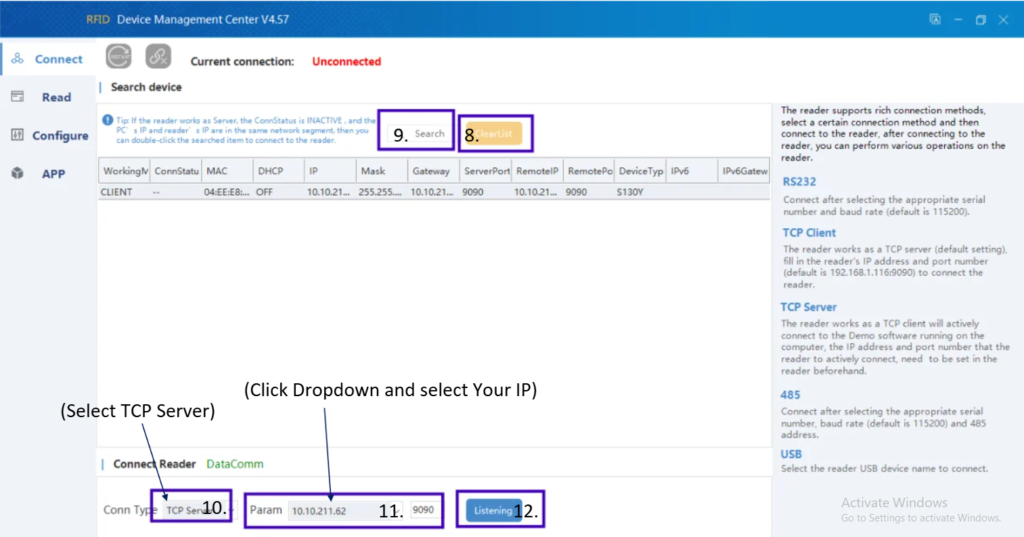
Select TCP Server communication mode. Choose the appropriate desktop IP address from the dropdown list, enter the communication port, and start listening.
Step 5 – Verify Reader Connection
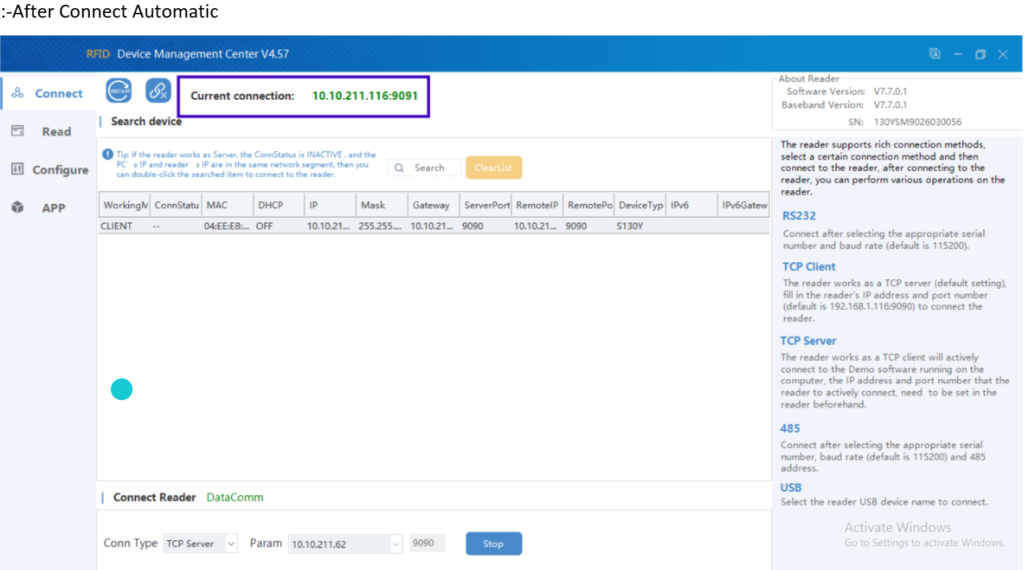
Confirm that the reader status changes to Connected. Ensure communication between the software and the HR-18 reader is established successfully.
Step 6 – Configure Reader Parameters
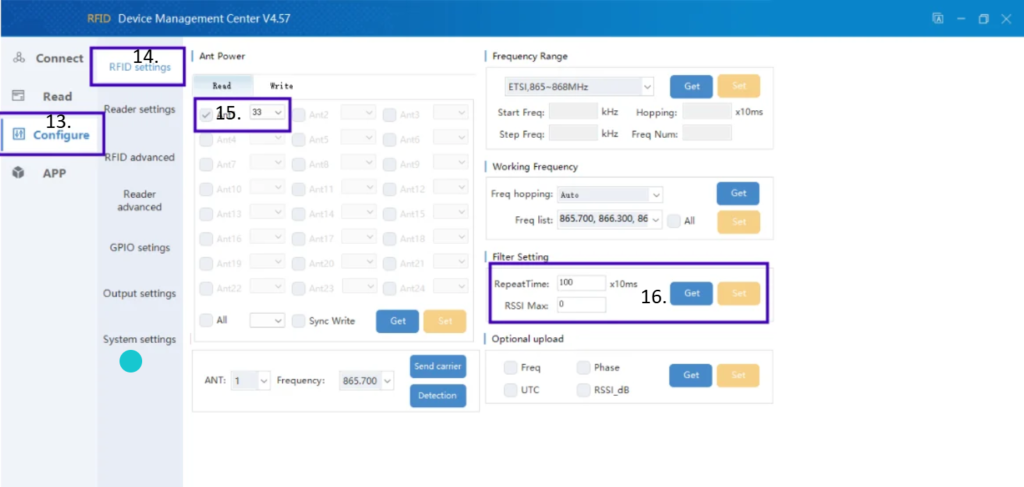
Navigate to RFID Settings and configure the working mode, frequency parameters, and filter settings required for weighbridge operation.
Step 7 – Configure RS232 & Buzzer Settings
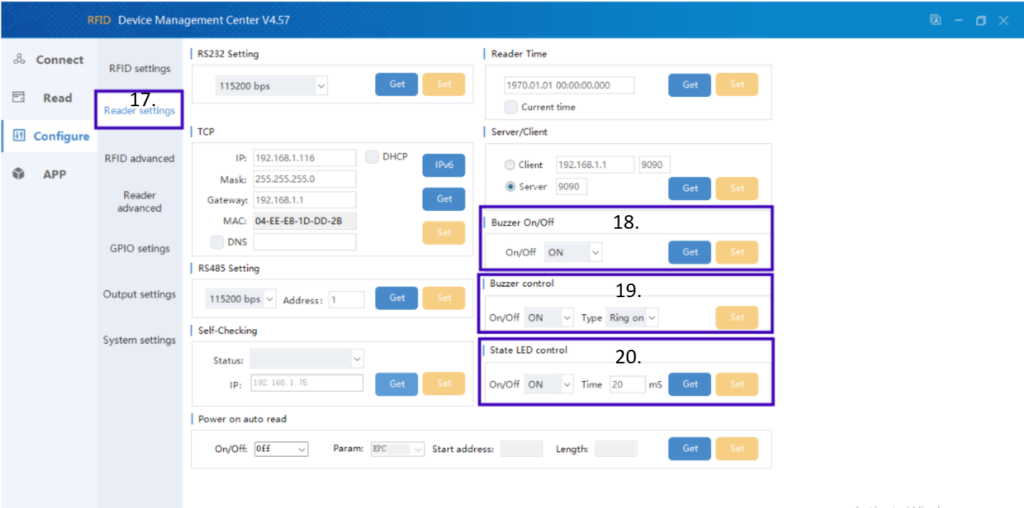
Open Reader Advanced Settings and configure RS232 communication parameters, buzzer settings, and output timing options according to project requirements.
Step 8 – Reader Advanced Settings
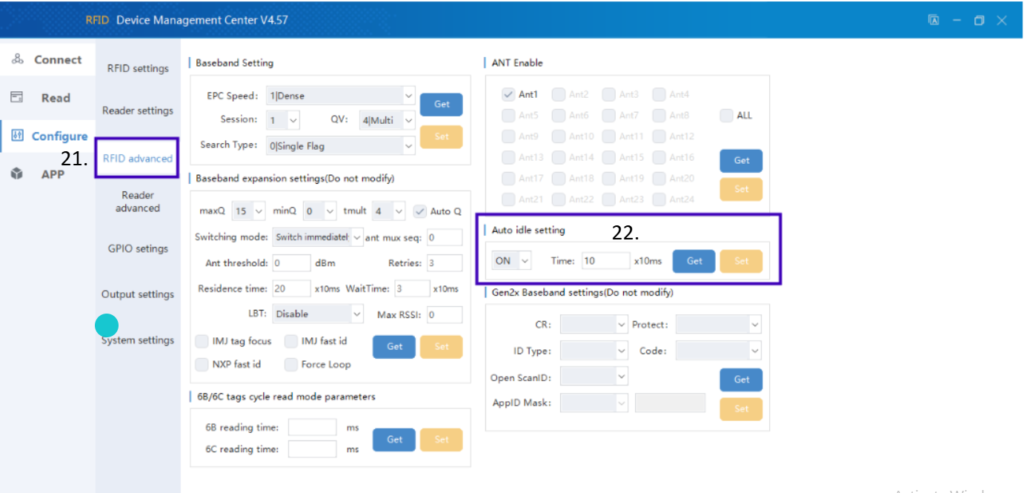
Adjust advanced reader options including search type, tag processing settings, and auto ID configuration for stable reader performance.
Step 9 – GPIO Configuration
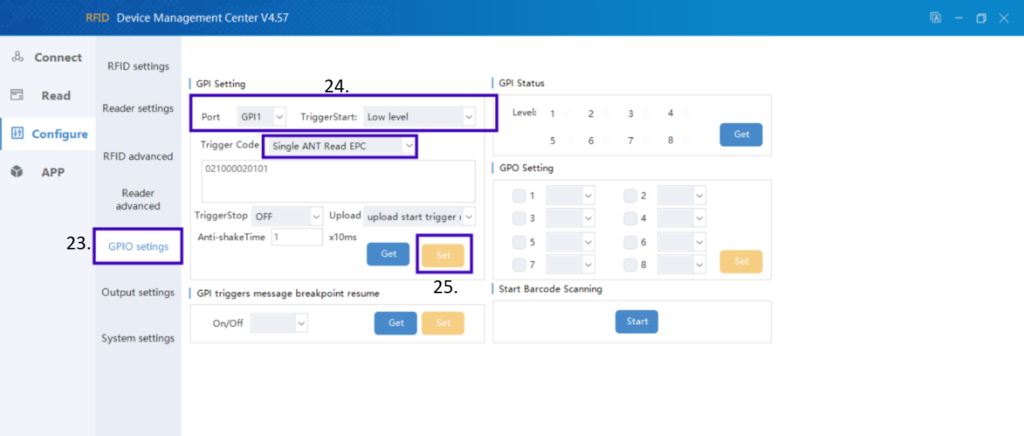
Open GPIO Settings and configure the trigger mode. Select Single ANT Read RFID and apply the required GPIO trigger parameters.
Step 10 – Output Settings
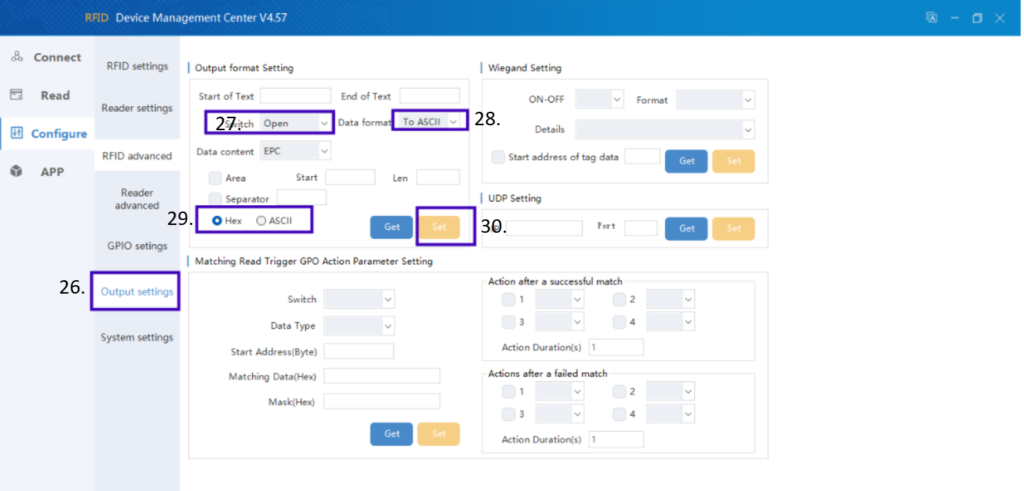
Configure output data format, separators, end-of-text characters, and transmission settings. Save the configuration after completing all output parameters.
Step 11 – Restart Reader
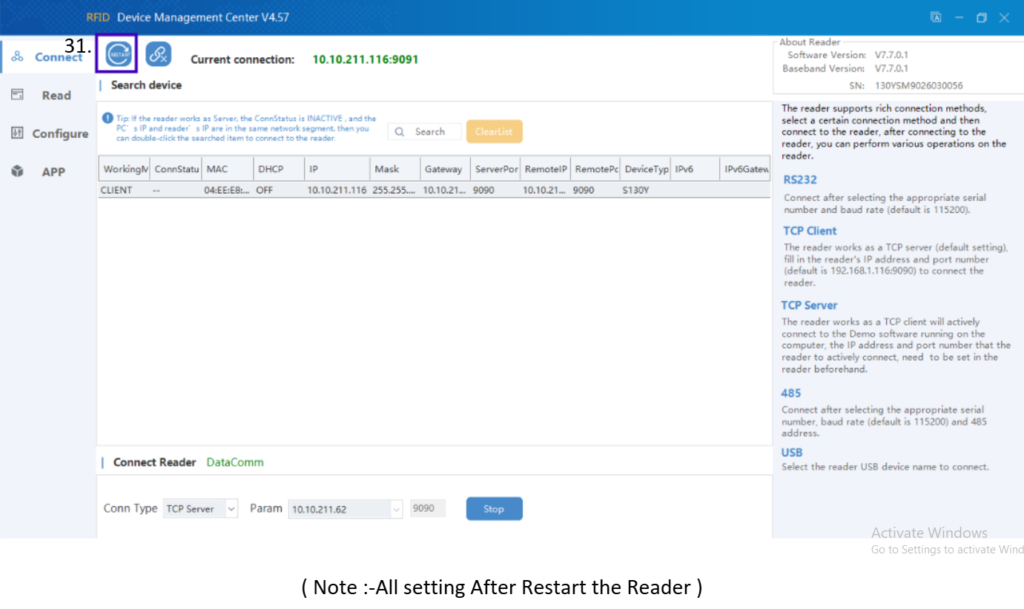
Restart the reader after completing all settings. This step ensures that every configuration parameter is applied successful.
Step 12 – Verify Weight Data
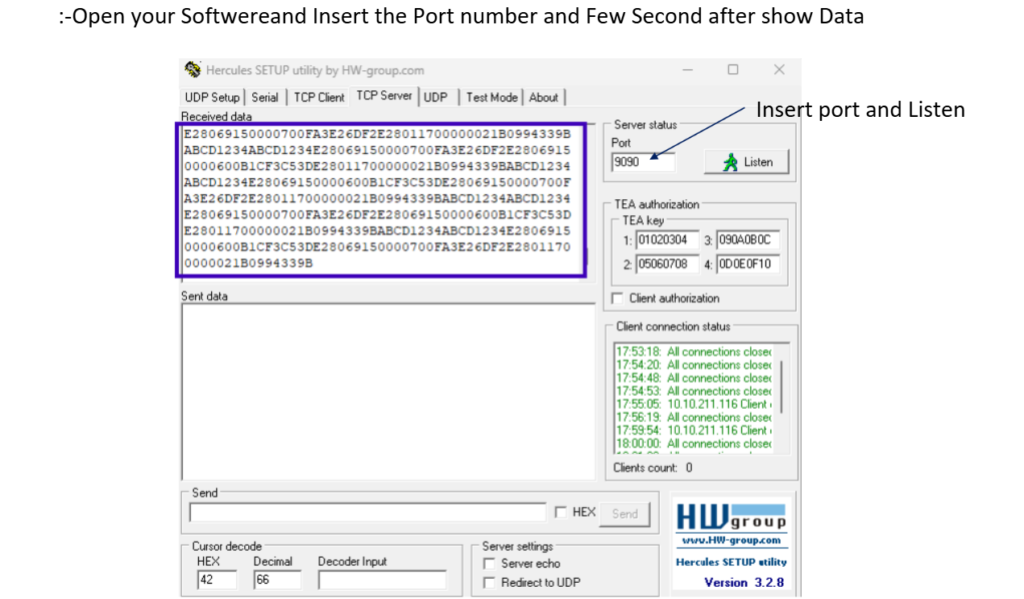
Open the weighbridge software, enter the communication port number, click Listen, and verify that weight data is received correctly from the HR-18 reader.
Important Note
After completing all configuration steps, restart the reader and verify that live weight data is displayed successfully in the weighbridge software before deploying the system in a production environment.
CategoryResources